First thank you very much for all the mesages, and tweets. It seems like you all enjoy this series. So let us continue with part 2. In this part of Making A ModPack series I will talk about changing configs, worldgen, and solving conflicts with biomes, enchantments and potions. If you have not already read it, part 1 can be found here: https://kehaan.me/?p=376
So lets get started.
Before we start, we first need to install a new program. This program makes it much easier to look in configurations, which we will look at in this part.
The program is called “Notepad ++” on Windows and is a free code editor. You can get it here: https://notepad-plus-plus.org/. Once you have installed it, you can continue with this guide. If you are using another OS then Windows, just continue and use your preferred text editor. There is a few other text editors, one of them being Sublime Text which can be found at https://www.sublimetext.com/. There is also https://atom.io/ which i have never used but got recommended. Personally i like Notepad ++ the most.
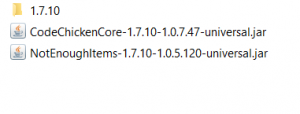
If you have followed the steps in part 1, your mods folder should now look like this.
It’s time we add a few more mods, to learn about editing them.
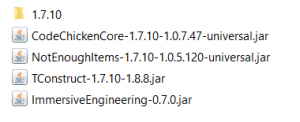
To show this, i have decided to go with Immersive Engineering and Tinkers Construct. You can get Immersive Engineering at http://minecraft.curseforge.com/projects/immersive-engineering/files and Tinkers Construct at http://www.curse.com/mc-mods/minecraft/tinkers-construct#t1:other-downloads. Once downloaded add them to your mods folder. It should now look like this
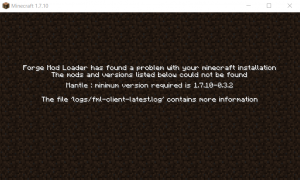
When it looks like above, start your instance. But HEY what is this. You are now getting this screen. “Forge Mod Loader has found a problem with your minecraft installation. The mods and versions listen below could not be found”
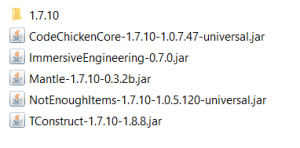
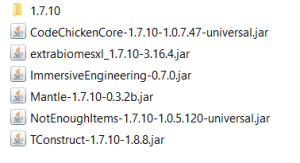
Press on the X, to close it. This message tells us that another mod is required before the added ones can work. In this case it needs Mantle. So download Mantle from http://www.curse.com/mc-mods/minecraft/mantle#t1:other-downloads. After that add it in your modfolder so it looks like this:
When it looks like this, start up your instance. It should now load up properly if you have followed the steps above. Once started press “Quit Game” to close it. Now, let us take a look at the configs.
- Right click your instance
- Open Instance folder
- Open minecraft folder
- Open the folder called “config”
Here you can find all your configs. Let us open one of them. If using Notepad ++, right click on “ImmersiveEngineering” and select “Edit with Notepad ++” In this config you can change many things which the mod author want you to be able to change. In this config you can change compatibility between different mods. You can also change a lot of general settings in the mod. If you scroll further down in the config you will come to a part called “oregen”. Here you can change ore generation for Bauxite, Copper, Lead, Nickel, and Silver. It is always good to write these down on a piece of paper. So you know which mod generates what. We don’t want multiple mods to generate the same ores. That just makes the world generation slower, and makes the player confused. You can also change potions ID’s. Something we won’t look into just yet.
Now close that config, and open the TinkersConstruct one. This mod also has a lot of things we can change. There are settings that lets us remove vanilla tools effectiveness, we can disable the beginner book, and even stop passive health-regen. If we scroll further down, there is a “worldgen” part. Here we can change the rarity of ores, but also set in which X and Y level they should spawn between.
If we scroll further down we come to this part:
“worldgen disabler” {
B:”Add Village Generation”=true
B:”Enable the Tinkers Villager to trade for oreberries”=true
B:”Generate Aluminum”=true
B:”Generate Aluminum Bushes”=true
B:”Generate Ardite”=true
B:”Generate Cobalt”=true
B:”Generate Copper”=true
B:”Generate Copper Bushes”=true
B:”Generate Essence Bushes”=true
B:”Generate Gold Bushes”=true
B:”Generate Iron Bushes”=true
B:”Generate Surface Aluminum”=true
B:”Generate Surface Copper”=true
B:”Generate Surface Gold”=true
B:”Generate Surface Iron”=true
B:”Generate Surface Tin”=true
B:”Generate Tin”=true
B:”Generate Tin Bushes”=true
}
Tinkers Construct generates Aluminium, Ardite, Cobalt, Copper and Tin as ores. If we look in our note, of which ores ImmersiveEngineering genereted, we see that it also generates Copper. Because of this, we can safely set “Generate Copper” from true to “false”. Your Tinkers Construct config should now look like this:
“worldgen disabler” {
B:”Add Village Generation”=true
B:”Enable the Tinkers Villager to trade for oreberries”=true
B:”Generate Aluminum”=true
B:”Generate Aluminum Bushes”=true
B:”Generate Ardite”=true
B:”Generate Cobalt”=true
B:”Generate Copper”=false
B:”Generate Copper Bushes”=true
B:”Generate Essence Bushes”=true
B:”Generate Gold Bushes”=true
B:”Generate Iron Bushes”=true
B:”Generate Surface Aluminum”=true
B:”Generate Surface Copper”=true
B:”Generate Surface Gold”=true
B:”Generate Surface Iron”=true
B:”Generate Surface Tin”=true
B:”Generate Tin”=true
B:”Generate Tin Bushes”=true
}
Save the config and start up the pack. You have now changed your first config. You should play around with this by disabling / enabling other things too. And see how they work ingame.
With worldgen, it is as written earlier very important that there only is one type of each ore spawned. It makes the world looks much cleaner.
It’s now time to add some new biomes to the world, so it’s not just vanilla. Before we do that, we need to take a look at IDs. Potions, Biomes, Dimensions and enchants use IDs in 1.7.10. In 1.6.4 items and blocks also had IDs which you had to make sure no one overlapped eachother. In 1.7.10 it’s a lot easier, and you just have to make sure the above ones don’t overlap. It’s always a good idea each time you add a mod, to take a look in the config folder. Here write down the ids, So you know which mods uses which. In most cases the mods allocate the IDs themselves correctly, but that’s not always the case. And that’s why we have ID dumps.
ID Dumps:
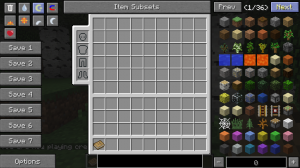
With NotEnoughItems (NEI) which we added in the beginning in part 1, we have the ability to see which IDs is being used, and which is free. To do this open up the instance, and make a world. Once inside a world, open inventory (press e). Click on “options” in left corner.
You should now see menu.
Click on “Tools”, and you see this menu.
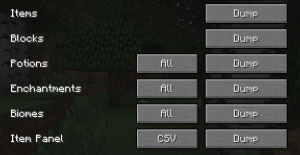
Click on “Data Dumps”, and you see this one:
For now, we need “Biomes”, “Potions” and “Enchantments” dump. If you press on the “Used” next to those, you will get to an option called “all” (Press 2 times). It should now look like this:
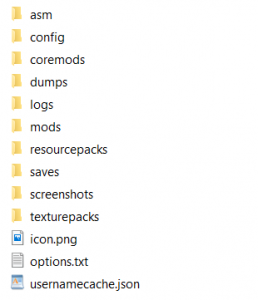
Now press on “Dump” to all 3. After that close the game. Right click the instance, and select “Instance folder” then open the “minecraft” folder. And there should now be a folder called “dumps” at the same place where config, mods etc folder is located.
Open the “dumps” folder. And you should see:
Open the “biome” file. And you should now be able to see all the biomes IDs and if they have been used. If there is written “null” next to them, they are unused, and you can use them yourself by changing the IDs in the mods config folder. The same counts for enchantment and potions file.
Now let us add our first biome mod. I go with ExtrabiomesXL. I personally like it because it don’t add a new worldtype. It works with the “default” one. And it don’t make some crazy looking biomes, that’s not realistic and don’t feel like minecraft. So go and get the mod at: http://www.curse.com/mc-mods/minecraft/extrabiomesxl. Once downloaded, add it to the mod folder.
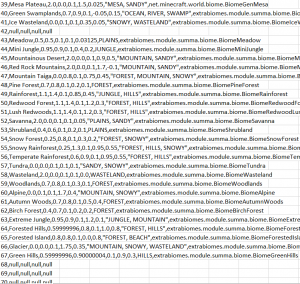
Now start the game. Make a new world and close it. After that open the config folder, and open the newly generated extrabiomes.cfg file. Here you can change IDs of the different biomes. Usually it does not conflict. But if you later add a mod like Thaumcraft, and Biomes O Plenty you will need to make sure it don’t conflict with each other. If you open the biomes dumps file, you can see that the ones extrabiomesxl have selected, is not used by anything else. The lowest biome ID extrabiomesxl use is “I:greenswamp.id=40” and according to the biomes dump file, we have free ids from 40 and onwards.
Now make a new id dump. Open the game again, and use the same step as previous. Do not have the biomes dump file open on the same time you make a new dump. If you have made a new successfully dump it will write it ingame. Now close it, and open the new biomes dump.
You can now see that we now use all IDs up to 67. If you add another mod that adds biomes. Look in that mod config file. Make sure it don’t use any of the IDs we already use. If it does, you have to change them to the ones we dont use. If there is a conflict, this usually wont crash the game. But will make world generation very bad, so be sure nothing is conflicting with each other.
The same above steps can be used with enchantments and potions, which we also made dumps of. If potions conflict, you will get another effect when using those, then what was really intended. Same way with enchantments. So a conclusion is. Every time you add a new mod, make it generate a new config file. Then check which ids it uses of both biomes, enchantments and potions. If the new mod uses something you already use. Change it in the config file using notepad ++. After you have changed it. Make a new dump, and make sure it has allocated them the correct way. Also write ids down on a piece of paper, if also a good tool
This is all for this week. You should now be able to change configs, make sure ids does not conflict, and if they do change them. Like always, feel free to tweet at me, if you feel like something is missing, or there are some errors. I plan on having Part 3 out next weekend.
Changes to Part 2:
16-01-2015: Published the guide.
29-01-2015: Added Sublimetext and Atom link, thanks https://twitter.com/ryanallmighty1 <3
